Archive for the ‘Household’ Category

Goodbye Nappies

Sunday, September 14th, 2008

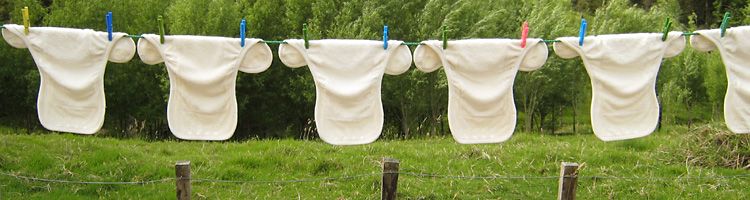
We’ve had the row of nappies (diapers for you Americans) on the banner at the top of this website for a while now, but it’s time to move on. Drying nappies on the clothesline has been a big part of our lives over the last several months, but Owen is now nearly ten months old, and it’s high time for a new banner. I thought I’d mark the changing of the banner (it’s garlic now) by writing a bit about our nappy/ diaper experiences over the past ten months.


Owen in a Motherease cloth nappy

Kevin and I had always assumed we’d use cloth nappies in order to avoid the environmental and financial costs of disposables. A while before Owen was born, I started to hear about people who were managing to go “diaper free” with their babies. I was fascinated, and wanted to know more about this. (I’d wondered before about how people managed without nappies in other times and cultures.) When a Farmlet reader emailed me and offered me some books on the subject, I was very excited. Reading these books was a life-altering experience for me, and I feel very fortunate to have had the chance to read them before Owen was born. Of the two books, my favourite is Laurie Boucke’s “Infant Potty Training”, because of the special focus it offers on infant hygiene practices in different cultures. Both books offered practical advice on how to tune in to your baby’s hygiene needs, and how modern Western parents can “potty train” a child from infancy. The idea is that a baby need never learn to ignore his bodily functions; he need never become accustomed to wearing a wet or soiled nappy. I write “potty train” in quote marks, since natural infant hygiene doesn’t aim to train a child so much as to teach parents to stay in tune with their baby’s needs. Both books focus on the parent-child bond rather than the material results of the process. This is another way of understanding and bonding with your child.

After reading these books, I became determined to use natural infant hygiene when our baby was born. We also decided to invest in a good set of nappies. Why? Because many parents prefer to wait until the baby is 6 weeks (or even several months) old to start natural infant hygiene practices. I read that some parents preferred to use nappies at night, or when out and about, or for part of the day– all depending on what felt right for them and their baby. Kevin and I wanted no pressure on ourselves or our baby, so we bought 36 good quality Motherease one-size nappies.

So, what has our experience with natural infant hygiene been like so far?

I will never forget my excitement the first time we caught a poop!! –when Owen was less than a week old, and I was still kinda shaky from losing a lot of blood when he was born. From that day on, we’ve caught most of his poops. [Kevin here: In fairness, Becky catches 98% of them!] Basically, going in the potty feels normal to Owen because he’s always done it. It took a lot longer (and more ups and downs) to sort out the pee situation. For a good while, it was a bonus to catch any pee at all. After that, our attitude was (and still is) “well, we catch some and we miss some,” but, sure enough, baby and parents can do this! By six months, it was a real surprise to miss a poop. Pee? On an average day we might miss three, say, but there are still “off days” where we miss far more than that. . .and good days where we only miss one. To a large extent this is all a matter of timing in relation to Owen’s sleeping and feeding. It’s also a matter of asking Owen how he feels and watching his reactions and body language. We have been teaching Owen some baby sign language also, and he has just recently started to use a hand sign to tell us when he needs the potty.

I’d originally assumed that we probably wouldn’t bother too much about nights. Two factors conspired to make things work out differently to how I thought they would!

1)Owen got nappy rash when he was about 2 months old. I attributed this (in large part) to the fact that he was spending too long in wet and very warm nappies during the hot summer nights. So I started keeping a close eye on Owen’s nappy during the night, and changing it as soon as it was wet. (Yes, this seemed like a real pain at first, but I was determined to get rid of the nappy rash. . . without resorting to yucky ointments and treatments. Of course, this was only possible because Owen sleeps right next to me.) From doing this, I learned that he pretty much only peed upon waking (or stirring) from sleep. Once I knew this, it seemed better to take him to the potty rather than wait while he peed himself.

2)Owen’s nappy rash went away pretty quickly once we started taking him to the potty during the night. After it was gone, we continued with nighttime potty trips, at least some of the time, since we were all used to the routine. Of course, the primary goal is sleep and comfort for all three of us, so if a wet nappy isn’t bothering Owen at 4 in the morning, Kevin and I don’t let it bother us either.

I would never have thought that we’d have dry nights before dry days, but that’s actually how it worked out. On a few occasions, Owen has woken up in the morning wearing the same nappy that he went to bed in. Of course, it usually doesn’t work out this way, but it’s neat when it does.


Mummy, dance with me

As it turns out, we still keep Owen in a nappy most of the time. We use a Motherease nappy without a cover. In a lot of ways, this is more like training pants than a nappy. It’s not waterproof, but it’s absorbent enough to soak up any spills. It’s easy to whip off and on (just a couple of snaps on each side) to go to the potty. Because there is no waterproof cover, we can quickly tell if Owen needs changing. Because the nappies are made of cotton terry (unbleached cotton), they allow Owen to feel the sensation of wetness and stay aware of what is going on. (Disposables and some modern cloth nappies wick the moisture away from the baby, with the result that children do not always learn to associate the sensation of wetness with the act of peeing.) We use the same solution (nappy with no cover) at night. It’s no fun fiddling with nappy covers when we are all sleepy and groggy, and wearing no nappy cover kept Owen a bit cooler in the summer, as well. We avoid the problem of pee soaking onto the sheets or mattress by laying down a couple of layers of wool soaker (squares cut from an old wool blanket) for Owen to lie on. We also cover or wrap him in a light woolen baby blanket. Wool is a great natural waterproof that is breathable and resists sogginess and smelliness.

So, in the event, “diaper free” does not describe us very well, and, while the nappies are set to disappear from the Farmlet website banner, they probably will not disappear from our lives for a good while yet. This is no problem with us. Our goal is not “early toilet training” by “normal” standards, though we’re certainly not complaining about having fewer nappies to wash! For me, the feeling of closeness and teamwork between parents and baby is probably the best thing about natural infant hygiene. This is just one part of being in tune with Owen and his needs. It’s also a natural and common-sense solution to nappy rash, and a neat way of caring for the environment and doing less laundry.

We are lucky to be at home with Owen most of the time: a very easy environment for natural infant hygiene. It’s also wonderful that Kevin has joined in with taking Owen to the potty since early days. I’ve been especially glad of this at night. Like I said before, it’s great to feel like the three of us are a team in all this!

Natural Infant Hygiene is so strange in our society, and it’s hard to know how people will react. I’ve mostly been very private about what we are doing, in order to keep things as low-key as possible, and to protect Owen from becoming a spectacle or an “example.” Having said that, the few relatives and close friends whom we’ve been open with have been wonderfully interested and supportive.

I first became interested in Natural Infant Hygiene after reading about it on the Lichenology blog. Thanks, Zane, Zena and Asher for showing me that, yes, real people actually do this! I hope that by sharing these thoughts about natural infant hygiene on Farmlet, we might in turn do our part in spreading the word to others who may be interested. For reasons of nurture and ecology, we think it would be a wonderful thing if these practices could become more widely used and accepted in modern, Western society.

Best Wishes to All on the Winter Solstice

Monday, June 23rd, 2008

Yesterday was the winter solstice. We went out to the coast to have dinner with my parents.

Midwinter:

Time to enjoy warm meals of oxtail soup and beef pot-roast.

Time to work on sewing and crafts during the long, dark evenings. Yes, I do still find a little bit of time for this, even with a crawly baby to look after! I’ve been making some home-made baby rattles, and have plans to mend some old sweaters and maybe sew a new shirt and dress.

Time to make sure warm covers are on the bed for the cold nights ahead. Though the solstice marks the solar midwinter, the climatic “midwinter” usually comes in July. We have a big warm duckdown comforter on our bed. It’s a kingsize, even though our bed is just a double. Owen snuggles between us in the nest, covered with a soft woolen baby blanket. This is a very cosy and happy arrangement, as long as Owen doesn’t wake up at 4am, churning his limbs like a conglomeration of eggbeaters. Fortunately we all sleep well most nights.


Young garlic growing in the winter sun

Time to get out the garden plans and seed catalogues, and make plans for the coming spring. We are keen to try growing a new kind of hot chile, recommended by some friends. They also have a recipe for some delicious hot chile sauce (a fermented one). We can’t wait to try this.

Time to plant garlic. Actually, our garlic has already been in the ground for about three weeks. We were given a very generous supply of seed garlic by some kind friends, so have been able to put in 300 plants. This is a huge increase over the last two years. We feel happy every time we look out the window and see all those spears of green poking out of the garden soil.

Best wishes to all on the winter solstice!

The Year of the Pig in Review

Monday, March 3rd, 2008

Best wishes to all for the Year of the Rat!

One year ago, at the beginning of the Year of the Pig, I set out a list of 13 goals for the Farmlet. With the year now over, it is time to review our goals and achievements, and to set new goals for the coming year.

Here’s the report on last year’s goals:

1. Have some earthworks done in the middle cow paddock, in order to create an irrigation dam and level a site for a barn. The cows will be fenced out of the dam area. (The area in question is already swampy and damp — not especially good grazing, but an excellent dam site. The elevation of the site will allow us to gravity-feed water to gardens and stock. We plan eventually to plant the area around the dam with trees, creating a special dam-microclimate.)

Yes, we had the earthworks done. Sites have been leveled for a shed and a large water tank. The dam filled up beautifully and has stayed full of water right through the summer. We have surrounded the dam area with electric tape and planted mustard and lupins in the turned soil to prevent erosion. Still to do: Establish the gravity feed water system and plant trees around the dam area.

2. Build a barn/shed in the cow paddock for milking, storage, and keeping calves. We need to have this in place by July, when the cows are due to calve. (In due course, we plan to collect rain water off the roof of the barn. We will install a water tank next to the barn, from which water can be gravity-fed down to to house.)

The barn/shed project was shelved. We have been grazing our animals down on our neighbour’s pasture, in the middle of which is an old milking shed. Having the use of this shed took the urgency out of our need to build our own. We still plan to build the shed eventually, but other projects now seem more pressing.

3. Fix the fences around the goat paddocks. We need to reinforce the fences and put in more electric wires, so that the goats can be kept in the paddocks without their A-frame collars on.

Kevin fixed the goat paddock fences, with the result that they are much more goat proof. What a relief!

4. Extend the goat houses to give the goats more space, and better access to dry feed during the winter.

We have not done this yet. Now, with the goats expected to kid this coming spring, this project needs to move to the top of the priority list!

5. Build a chook house, and get some chickens. We plan to start with a small movable chook house in the house paddock. This way, the chooks can help us to clear kikuyu and create new garden areas. (Eventually, we would like to have a larger number of chickens ranging on the pasture up the hill.)

Alas, we still have no chooks! Over the past few months, Kevin and I have started to change and refine our chook house/ chook run plans. We are determined to tackle this project soon.

6. Plant fruit trees. Build supports for passion fruit and kiwifruit vines.

We have planted some more fruit around the place — a guava, a naranjilla, a boysenberry, a couple of tropical apricots and a grapefruit. I have also propagated seedlings for more passionfruit (both purple and yellow varieties), cherimoya, plum and guava, and we have been given a small fig, a raspberry, a thornless blackberry, a blackcurrant and a macadamia nut. We have to find places to plant all these! The passionfruit have supports to climb on, and we have just been enjoying the first fruit. The kiwifruit still need a pergola to climb on. They are looking a bit wretched after getting a rather fierce pruning from Daphne — naughty goat.

7. Continue to expand and develop gardens in the house paddock – including barrier plantings to keep out kikuyu.

We expanded the gardens by a considerable margin this spring, clearing the area that we are now using to grow corn and beans. We also worked on improving the soil structure in the existing beds. I didn’t do much work on barrier plantings in the end.

8. Experiment with making kefir, quark, and various cheeses. (This will be happening after our cows have calved and we have a good supply of fresh milk. We also hope to continue making yoghurt and butter.)

We have enjoyed making kefir, kefir cheese, Caspian Sea yoghurt, and butter using milk and cream from our own cow, Coco. I have to admit, though, that since Owen came along, I’ve really only kept going with the yoghurt (we get through several litres of this every week), having killed off our poor kefir grains soon after he was born. I’ll have to get some more! We’ve also been buying butter, which saves time, even if it’s not as nice as making our own. I’ve had several attempts at quark, and all have turned into yoghurt. The yoghurt culture has obviously taken up firm residence in this house and seems set on colonising any milk that I leave out at room temperature! Not good news for my quark mission.

9. Experiment with making assorted fermented beverages — perhaps using herbs from the garden.

I have had a lot of fun with fermentation over the past year, including growing a ginger beer bug and making ginger beer using our own lemons. I’ve also made water kefir using lemons and herbs from the garden. Sadly, the water kefir grains got very sulky quite some time ago, and nothing I could do would revive them. I am now looking to purchase some more. We continue to brew kombucha.

10. Grinding flour and making sourdough bread has become part of our routine by now. I’d like to get into the habit of using the sourdough in some other creative and delicious ways.

Yes, during the past year I found some delicious sourdough recipes in “Full Moon Feast” — sourdough pancakes, crackers and scones. I have also used sourdough to make fishcakes and pizza crust. By now, these recipes have become old favourites.

11. Start growing some “bushman’s toilet paper.” We plan to start seedlings and plant them out in the garden when they are big enough.

Ah. . . ! I’d forgotten all about this one. But it sounds like a neat idea. We should do this!

12. Install a solar hot water heater to cut our power bill and increase our energy self-sufficiency.

Kevin has been researching our options in this area, and has finally found one that looks right for us. With any luck, we’ll soon be embarking on this project.

13. Keep a more systematic record of income and expenditure. In particular, I think it will be satisfying to have records that clearly document the changes in our grocery bills as we produce more and more of our own food.

I kept these records very diligently through until October last year. Since our little one was born, my attentions have been focussed elsewhere, to the detriment of my record keeping! I hope the records will remain a useful basis for comparison as the Farmlet changes and develops.

So. . . does that mean we’ve achieved 8 out of our 13 goals? I suppose that’s not too bad.

The Year of the Pig has been a special one for us. Our goats grew to maturity, the first Farmlet calves were born, Kevin learned to milk a cow and shot his first wild pig. I got my firearms license. We had a rough time when Coco’s calf was born dead and we had to mother a new calf onto her. . . and it was hard to say goodbye to our fabulous cow, Esmerelda, even though she was going off to an excellent home. Of course, by far the most significant event of the year for us was the birth of our precious baby: Owen Thom Flaherty, born on the 16th of November 2007, Year of the Red Fire Pig. Our very own dear little piglet.


Owen

Now I’ve started compiling a new list of goals for the Year of the Rat. I hope to post this list in the next few days, so please stay tuned.

Home-made Aloe Vera Moisturizer

Tuesday, July 3rd, 2007

I have already written about home-made toothpaste, and baking soda and vinegar hair-washing. These are small but significant parts of our everyday life here on the Farmlet. Here is another personal-care solution that I’d like to share:

Aloe Vera Moisturizer

Ingredients:

4 parts aloe vera gel
1 part vegetable glycerine

Method:

1. Pick several leaves from your aloe vera plant. Extract the gel by scraping the juicy flesh off the skin with a blunt knife, bit by bit. Strain the gel through a piece of fine gauze or light fabric to remove any lumps.

2. Once you have the desired quantity of strained aloe vera gel, mix in the vegetable glycerine.

3. Store in the fridge in a screw-topped glass jar.

We love using this moisturizer. It feels light and refreshing on the skin, is cheap and easy to make, and contains no toxic chemicals. I adapted this recipe from Better Basics for the Home, by Annie Berthold-Bond (This book is full of neat recipes and ideas!), and we have now been using it for almost a year. Aloe vera has fantastic healing and moisturizing properties, and glycerine is a good emollient, so this is a powerful combination. Still, some people with very dry skin may find that they do better with an oil-based moisturizing preparation as well, or instead.

Questions and Answers:

How important is the ratio of aloe vera to vegetable glycerine? The recipe is very forgiving. Too much glycerine might make the gel feel very sticky on your skin. Test the preparation, and adjust it to suit your preference.

Can you make this moisturizer using commercial aloe vera gel? Yes, that’s what the recipe in the book calls for. We just prefer to use home-grown aloe vera. Caution: I’ve found that many of the commercial aloe vera gels contain parabens, which we and many others prefer to avoid.

How long does this preparation keep? We’ve kept it in the fridge for up to a couple of months with no problems. That’s the limit of my experience, since we’ve only made quite small batches.

Where do you buy vegetable glycerine? Our local health food/ natural products store stocks it, so I’d start by looking/asking in those kinds of places. You might also find it at a good pharmacy, though they tend only to stock the “regular” petro-chemical glycerine.

Cleaning House

Thursday, June 7th, 2007

Cleaning the house certainly isn’t the most popular job here on the Farmlet. This would be obvious to anyone who sees the cobweb collection around our windows. Yes, Kevin and I both have a soft spot for spiders, but that’s not the only reason why this place is starting to look like the haunted house. The cobweb situation has been getting out of control. (Actually, Kevin had a “pet” spider called Igor for a while — a fabulously fat black arachnid, who lived outside the front door and had a hearty appetite for fly carcases. He/she seems to have moved on, now.)

Although some of the house-cleaning tasks are not our favourites, I can say that I take a real satisfaction in finding ways to clean the house that are kind to the environment and to our wallets. Annie Berthold-Bond’s Better Basics for the Home, and Karen Logan’s Clean House Clean Planet have lots of fantastic ideas along these lines.

Today, as the rain poured down, I dusted and washed the insides of some of our windows. Then it was time to clean the bathroom. I imagine that a lot of people will already be familiar with these tricks for eliminating the use of expensive/toxic cleaning products, but felt inspired to share a few of them, in case they are of interest to someone.

Washing windows? Use hot water with some white vinegar and a tiny bit of liquid soap in it. Dry and polish with screwed/up pieces of newsprint paper. You can use newspaper for this, but I don’t like the black smudges it puts on hands — and windowsills and walls if you are not careful. We save any plain newsprint we find (in packaging and so forth) for this purpose.

Cleaning tubs and tiles? Scoop a bit of baking soda onto the dirty surface, add a squirt of liquid soap, mix them together, and you’ve got a cream cleaner that will bring a shine to the grubbiest bathroom sink. Baking soda cuts through grease, is a mild abrasive, deodorant, and disinfectant. Pretty neat stuff.

Removing coffee and tea stains from mugs and other kitchen items? Another job for the baking soda. Baking soda also helps clean grease and baked-on grime from baking pans and other kitchen utensils.

Cleaning the toilet? Drop 1/2 cup of baking soda into the toilet bowl, and scrub thoroughly. Now add 1/2 cup of white distilled vinegar. It will fizz like mad. Leave to sit for a while before flushing. Of course, we can’t use this method on our composting toilet! Unfortunately, our flush toilet gets pretty crusty, even if we hardly ever use it, because of out water supply. The water comes from a spring, and leaves discolouring and mineral residues in the toilet bowl. We’d have to use something stronger than baking soda and vinegar to solve this problem. Maybe borax? But I haven’t found any borax in the Kaitaia shops. . . and we are happy enough to put up with a bit of discolouration, as long as the bathroom is clean and fresh.

Note: We’d love to have a go at making our own soap at some stage. When I looked at the cost of buying materials to make soap, however, it started to look like an expensive project. We are lucky to have access to good quality and affordable liquid and bar soap (made using vegetable oils, and free of toxic chemicals) in the ready-made form, for the time being. We buy these in bulk. Even better than buying oil and lye for soap-making, would be to make our own oil and lye. . . but I think we’ve got a few other projects to tackle before we go there!