Archive for the ‘Fermentation’ Category

Sourdough Pet

Wednesday, April 4th, 2007

In late March last year, very soon after we were married and moved here to the Farmlet, I decided we should make a sourdough starter to mark the beginning of our new life here. I wanted to make a special “Farmlet Sourdough” with wild local yeasts rather than using commercial yeast to get it started. Though I’d heard some reports that trying to catch your own wild yeast could yield less-than-satisfactory results, I felt we had nothing to lose by giving it a go. Of course, there is a lot of advice about making a sourdough starter on the internet. I found this site especially helpful, as it has clear instructions on how to get the starter going. I’m not crazy about his bread recipe, though.
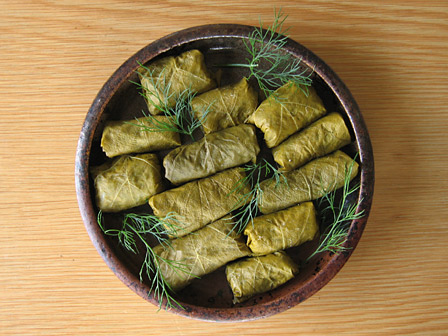

Sourdough crackers

Once our starter began to bubble, I tried to bake a loaf of bread with it. The bread came out with a promising sour smell and taste, but had the consistency of a brick. As a novice, I had obviously tried to use the starter too soon. We tasted (nibbled) the loaf, and Kevin made polite comments about the taste and flavour, while I lamented at having baked a horrible brick. Still, I didn’t give up, and kept hoping that the sourdough would mature enough to raise a loaf properly. Our patience was rewarded a couple of days later when the starter literally started bubbling out of the jar. I tried again to bake a loaf of bread. Success! The sourdough yeast colony was our first “livestock” on the Farmlet; our first “pet.”

In the course of the year, our grain mill arrived, and we were able to start feeding the sourdough with freshly ground wheat. With time, the starter has mellowed and matured, and I’ve continued to refine my sourdough baking techniques. Our starter seems to be reliable and robust, surviving occasional neglect and not getting contaminated by outside organisms. The bread we make is dense and sour, and leaves us feeling nourished in a way that store-bought and commercial-yeast bread never has.

Lately, as per one of our goals for the Year of the Pig, we have tried a number of new sourdough recipes — trying to expand our repertoire beyond the sourdough bread (and occasional sourdough pizza crust) that we enjoy so much. We have now sampled batches of sourdough herb-cheese scones, sourdough crackers, sourdough crumpets, and sourdough pancakes. All were delicious, and look set to become regular fare for us. Kevin says the crumpets are probably his favourite new sourdough treat. The crackers are my pick. I’d like to have some of those in the cupboard at all times. The success of these new recipes is really heartening, since last year I had a couple of less-than-stellar results from sourdough scone and pancake recipes.
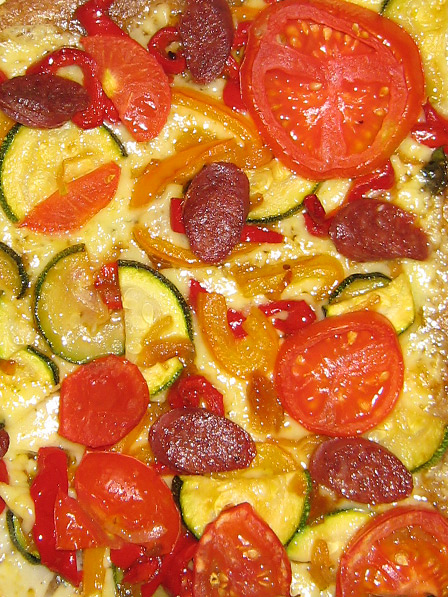
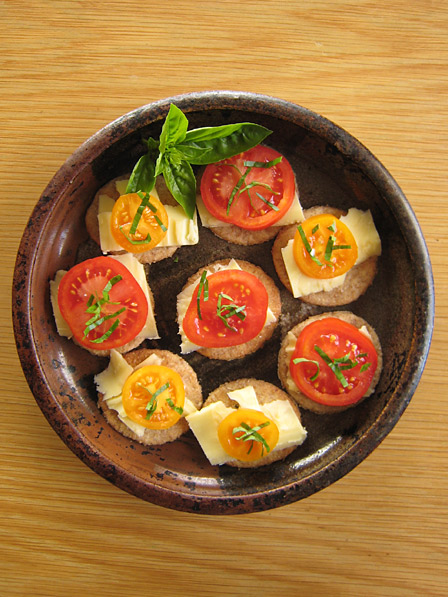

Sourdough pizza

All of these new and successful sourdough recipes came from Jessica Prentice’s Full Moon Feast. I love this book! Prentice uses the seasonal rhythms of thirteen lunar cycles as a framework to deliver thirteen chapters of intelligent and thought-provoking insights into our cultural relationship with food. Starting in the dead of winter with the “Hunger Moon,” the book moves through the seasons — “Sap Moon,” “Egg Moon,” “Milk Moon,” “Moon of Making Fat,” — until it ends in winter again with the “Wolf Moon.” Each chapter includes a selection of delicious recipes. (At least, all the recipes we’ve tried so far have been delicious!) The author lives in Northern California, but I’m pleased to say that the recipes seem to contain relatively few ingredients that we couldn’t hope to find here in rural New Zealand. Often the recipes suggest adaptations and alternatives that take into account local variations in ingredients. I really appreciate that. When this book first arrived, I read it from cover to cover. Now we are enjoying it as a recipe book.

If anyone reading this post lives locally and would like some sourdough starter, we’d be more than happy to share it.

Fabulous Pets in Our Kitchen

Saturday, March 24th, 2007

Finally we have some more livestock here on the Farmlet. These are not cows or goats, but colonies of bacteria and yeasts. They live in the kitchen, and I like to call them our “pets.”

We now have starters for kombucha, water kefir, kefir, and Caspian Sea yogurt. My sister and her partner were kind enough to transport them here for us when they traveled up from Wellington. They must have transported the pets with great care, as all arrived in good shape. They have settled well into their new home!

Here’s an introduction to the new pets, along with links for those who are curious:

For those who don’t know about kombucha, it’s a colony of yeasts and bacteria that form a slimy pancake-like mass known as a “scoby,” a “mother,” or a “mushroom.” The scoby will transform a container of sweet tea into a delicious sweet and sour beverage, which reputedly has great health-giving properties. The colony produces a new scoby with each batch, so you soon get plenty to give away to friends. My Dad took one look at the scoby and declared he’d be a bit concerned if he found one of those in his fridge. It certainly looks pretty dodgy!


Kombucha

Water kefir are clear crystal-like grains that will culture sugar water (with other ingredients added) into a fizzy, refreshing beverage. We’ve been adding lemon, raisins, and various herbs from the garden.


Water kefir

Kefir (milk kefir) are opaque grains that will culture milk at room temperature. We have been using the resulting kefir to make smoothies. I’m also keen to try making some kefir cheese.

And what about Caspian Sea Yogurt? It is a special yogurt that cultures at room temperature. Instead of heating the milk and keeping it at above room temperature to culture, this culture can just be stirred into raw milk at room temperature and left to thicken. It takes about 8-12 hours. The resulting yogurt is mild and creamy, with a stringier texture than regular yogurt. It’s really easy to make, and Kevin and I find it extremely tasty. Until a couple of weeks ago, I never knew there was such an easy way to make raw milk yogurt.

We are having a lot of fun playing around with all these new livestock. If any readers live nearby and would like to have some starters, please let us know. We’d be delighted to share.

Grape Leaves

Monday, December 11th, 2006

I am trying to prune the grapes so that they don’t take over the vegetable beds. This is a bigger job than it ought to be, because we missed our chance to prune them in the winter. We are certainly learning from our mistake, and plan to be better organised next winter! The grapes are now a beautiful, rampant, tangled mess, and I am struggling to sort through it all in order to prune. According to our neighbour, who has a great many grape vines of the same variety as ours, doing plenty of fix-up pruning now will give us the best chance of having a decent crop despite our negligence over the winter.


More grape leaves, please

Since I am pruning the grapes, it’s a good opportunity to make pickled grape leaves. Here is the recipe I used to make an inauthentic version of “Podonnip Chorim,” or Grape Leaf Kimchi:

Grape Leaf Kimchi
36 tender young grape leaves, stalks on, washed thoroughly
1 tablespoon sea salt

4 tablespoons whey*

2 cloves garlic, minced or finely chopped

1/4 teaspoon chile flakes

2 teaspoons fresh ginger, grated or very finely chopped

Mix whey, salt, and 2 cups of water. Soak the grape leaves in this mixture for about an hour, weighting them down so that the liquid covers them completely.

Roll up 12 of the leaves, all together, and stuff them into a wide mouthed 1 quart (1 litre) preserving jar. Sprinkle with some of the ginger, garlic and chile. Roll up 12 more leaves into another roll. Stuff this roll in the preserving jar on top of the first one. Sprinkle with seasonings. Do the same with the final 12 grape leaves.

Now pour the whey/water/salt mixture into the jar on top of the leaves, so that they are completely covered. Add a little water if necessary. Make sure you leave an inch of space at the top of the jar, as the contents may expand.

Cover the jar tightly and leave at room temperature for 3 days. If necessary, put a weight on top of the leaves to keep them immersed in the liquid. After 3 days, move the jar to the fridge of cold room for storage.

*To make whey, put some plain live yoghurt in a cloth and leave it to drain over a large bowl. The liquid that drains out of the yoghurt is the whey you need for this recipe.

In Korea, they don’t use whey to innoculate their kimchi. Also, I think that they add rice porridge and fish sauce to some kinds of kimchi, but I’m not certain about that! I intend to do some research on this matter, and will be sure to write about it if I end up making fish sauce and rice porridge and adding them to future batches of kimchi. (I think Kevin has some serious concerns about sharing the house with any kind of fermented fish project, so I will have to tread carefully in this matter!)

As well as making one batch of spicy grape leaf pickle, I’ve made a second plainer batch — omitting all the seasonings except for the salt and whey. These can be used for making dolmades.


Dolmades

One way to serve the Korean-style pickled grape leaves is with sticky rice, whole lettuce leaves, chile sauce, toasted sesame seeds, and pieces of cooked marinated beef (marinate in honey, garlic, soy sauce, and a little fresh citrus juice). Diners can use the lettuce and/or grape leaves to make little parcels of the other items. Yum!

We humans are not the only Farmlet creatures who enjoy eating grape leaves. The goats love them, too. I tethered them in the yard while I was pruning, so that they could munch to their hearts’ content on discarded grape leaves.

Garlic Scape Kimchi

Sunday, November 26th, 2006

When I wrote about the garlic scapes a while back, I mentioned that we were going to make kimchi with some of them. Now that we’ve tried the kimchi, I have to admit that we much prefer to eat the garlic scapes stir-fried. Still, we’d probably make this kimchi again if we couldn’t get through all our garlic scapes while they are still fresh. The kimchi tastes fine, even if it’s not as good as eating freshly cooked garlic-scapes, and it’s certainly a good way to preserve them.
I tried making two versions of the kimchi — one raw and one blanched. The raw one was stringy and horrible. Even Kevin wouldn’t eat it, and he’s a full-scale garlic monster! We won’t be making that again! We certainly advise blanching the garlic scapes before making them into kimchi.
Garlic Scape Kimchi

  • Blanch enough garlic scapes to pack into one quart-size jar, so that it is full up to about 1 1/2″ from the top. (To do this, just bring plenty of water to a rolling boil, drop the garlic scapes in, and drain the water out about 3o seconds later. Immediately rinse the garlic scapes in cold water.
  • Pack the garlic scapes into the quart-size preserving jar.
  • Mix 1/2 a cup of water with 2 tablespoons of whey* (see note below), 2 teaspoons of sea salt, 1 tablespoon of grated ginger, 1 large clove of minced garlic, 1/2 teaspoon of chile flakes or chile powder.
  • Pour this mixture into the jar with the garlic scapes.
  • Top up with water if need be, so that the garlic scapes are fully covered with liquid. The garlic scapes tend to float a bit, so you can weight them down with a clean river stone if you want to. The water should be at least an inch below the top of the jar, since the contents may expand during fermentation.
  • Close the jar tightly, and keep it at room temperature for about 3 days. After that, it will be ready to go in the fridge.
  • Now you can eat it. . . but ours tastes much better after three weeks than it did when we first made it. We advise you to wait a while! it should keep in the fridge or cold room for many months.

NB: *To make whey, line a strainer with a cloth and pour in some good-quality plain live yoghurt. The liquid that drips out of the strainer is they whey you need for this recipe.

Kimchi

Tuesday, September 26th, 2006

Ever since we planted the first bok choi seeds, I’ve been thinking about how good it would be to make some bok choi kimchi (kimchi is a Korean-style sauerkraut). Finally, our bok choi is ready to harvest, and we are engaged in our much-anticipated bok choi kimchi experiment.


Bok choi, ready to harvest

Kevin and I are very fond of lactic fermented vegetables, which have become a regular part of our diet since we moved here. Lactic fermented foods contain lots of health-giving enzymes and vitamins. Lactic fermentation is a simple traditional way to preserve food without losing nutritional value. Actually, the process adds nutritional value to the food — like making yoghurt out of milk. They also taste delicious — less acidic and more mellow/complex than vinegar pickles.

In case you are interested, the recipe book, Nourishing Traditions, by Sally Fallon, has some good recipes and guidance for making lactic pickles. It really helped us get started. If I’d known it was that easy to make your own fermented vegetable pickles, I’d have started doing it much sooner. Wild Fermentation, by Sandor Ellix Katz, might be another good book to look at. This book is on my wish list, as I think it might give us more interesting ideas and recipes to work with. Maybe we’ll get it next time we are putting in an order with Amazon.

We’ve made various different kinds of lactic pickles in our little kitchen here, but this is the first time we have produce from our own garden to ferment. It feels like a small milestone!

I’ve never tried to make kimchi out of bok choi before, so let’s hope it works ok. I’ll post the outcome in a few days!

Here’s the recipe:

Bok Choi Kimchi
7 heads of bok choi, cut into quarters lengthwise
1 1/2 tablespoons of sea salt
1/2 teaspoon of chile flakes
2 tablespoons of fresh ginger, finely chopped
5 cloves of garlic, minced
4 tablespoons of whey (You can get whey by putting some live natural yoghurt in a cloth, and collecting the liquid that drains out of it.)

Method: Mix all ingredients together in a big bowl. Pound and crush the bok choi to release some of the juices — without completely pulverising it. Leave the mixture to sit for a few minutes to draw out a bit more moisture. Now put the mixture into a large preserving jar, pressing it down to pack it in, and so that the liquid comes up to cover the vegetables. Leave about 3cm of space at the top of the jar, since the kimchi will expand a bit as it ferments. Close the lid firmly, and keep at room temperature for 3 days. Now it should be ready to eat.


Kimchi

You can now store the kimchi in the fridge or root cellar, where it will keep for several months. The taste is good immediately, but improves as the kimchi matures.

Slug Update

You might remember that we were having a problem with slugs devouring our bok choi plants. Somehow, with my nightly slug hunts and our beer traps, the slugs have been kept under control, and we will get to eat most of the bok choi. Farmlet reader, DR, has suggested using coffee as a slug and snail repellent. We are keen to try this trick. Also, BB suggested using khaki campbell ducks to eat the slugs. We like this idea too. Khaki campbell ducks are supposed to be wholly carniverous, so would not eat the seedlings. I’m still a bit worried that the ducks might kill seedlings by standing or sitting on them, though. Has anyone out there had experience with khaki campbell ducks in a vegetable patch?